DON’S CUP OF GOLD – THE ULTIMATE HONDA CB900F
Don Ricciardiello has been a member of BIKEME! since the beginning. The surname would be familiar to the racing fraternity. His brother, Mario, holds a deity-like position among those who understand things about motorcycle fabrication and design. If you have a race bike with a “Ricci” frame, you are one fortunate bastard.
For the past few years, Don has been teasing and over-stimulating the membership with his project bike – a venerable CB900F Honda. Now and again he would post up pictures of the bike’s restoration progress and those images would invariably set some of the members into a frenzy of self-abuse and awe.
We have seen may restorations. We have never seen anything like the time and effort and skill that has gone into Don’s Honda.
We shall bet good money that you haven’t either.
By Don Ricciardiello
Looking back fondly on years long passed, reminiscing of one’s youth when everything was more carefree, simpler and, dare I say, better is something most of us older blokes are guilty of. I figured I could recapture the feeling of that time with an old motorcycle and maybe rekindle those halcyon days.

The “limit” was somewhat different back then.
Hopefully, it wasn’t by introducing him to the nicest people.
Nostalgia is a wondrous thing. But be warned. She is a temptress sent to deceive. The charm of that old motorcycle from your impressionable youth maybe alluring but those hazy romantic views of the old world are brought sharply back into focus when you ride an old bike after a diet of modern ones.
Yet I still wanted one. However, putting up with old bike manners was not an option. The world had moved on. The bike had to go, it had to stop and it had to turn corners without tying itself in knots.
A plan was hatched to build a bike that would have New World civility but maintain its Old World visual character. That meant more horsepower, stronger brakes, suspension that worked and light wheels for modern tyres. But which bike?
The bikes that left the deepest impression on me as a youngun, were the big brawny Japanese behemoths from one of the Big Four. These bikes were dominated by big engines and a weak and flimsy everything else. A few of my mates back then owned Honda CB900F Bol d’Ors, or ‘Roller Doors’, as they were known. They were a good-looking bike and handled well (relatively), but lacked a bit of go when compared to the king of the time, the mighty Suzuki GSX1100. Nothing succeeds like excess, so the mighty GSX was my weapon of choice back then.
Fast forward 30 years and the dinosaurs have long disappeared so finding one to do up that wasn’t totally fossilised was not easy. My brother Mario had not long completed a resto of his GSX1100 so a bit of variety was called for and when a Roller Door popped up on eBay I jumped at it.
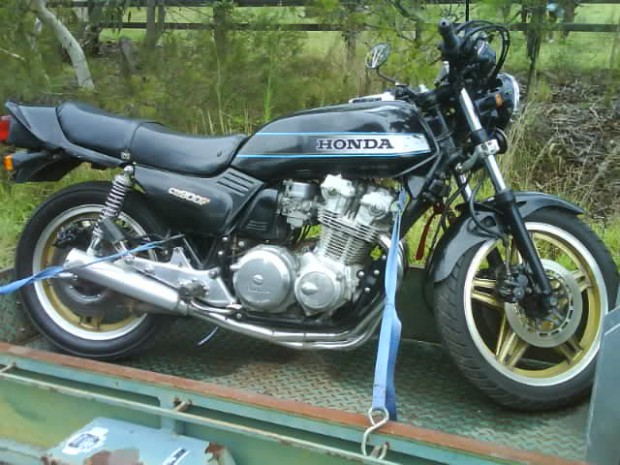
Don’s trailerful of dreams, memories and work.
As is usually the case with eBay auctions, the pictures didn’t tell the full story, but in this case the bike wasn’t too bad. It was complete, it ran and most importantly, the bodywork was sound.
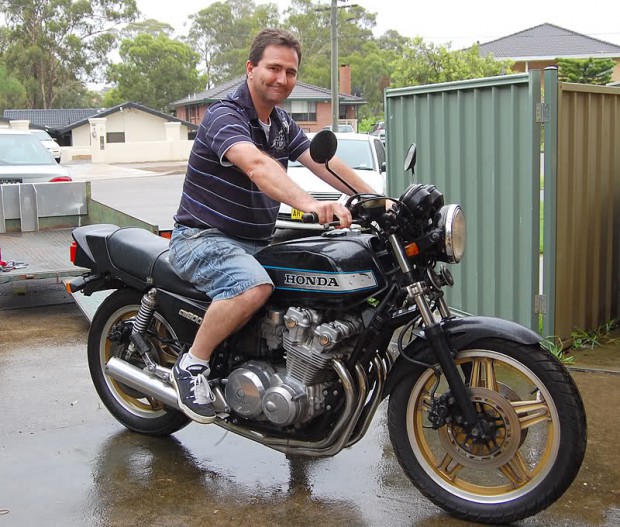
Yes, it’s all happiness and smiles until someone starts to strip it.
I gave it a quick once over, serviced the engine and brakes and threw some skinny tyres at it for rego. It was good enough to pass first go and off into the sunset I rode.

Don chasing sunsets.
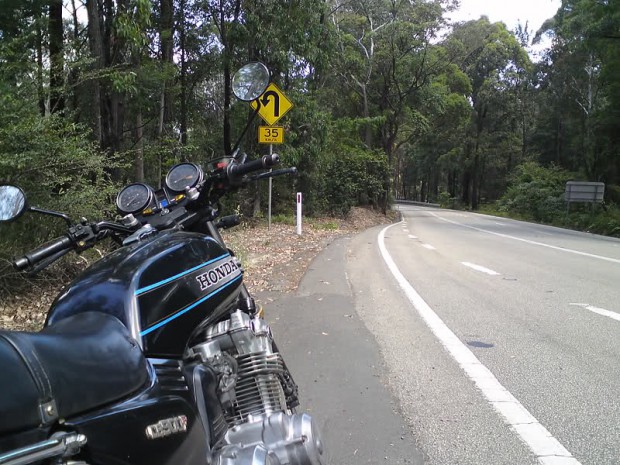
Hmm, yes. That looks like a safe speed.
It is a testament to riders past who could throw these things around Amaroo Park for six hours and live to tell the tale. Heroes to a man. I was no hero, but I rode it for about a year or so while I researched and planned what I was going to do to the bike and collected the parts I would need. Thank the Road Gods for eBay and the then strong Aussie dollar.
The time finally came to sort the old girl, so it was out with the spanners and hammers. There’s not much holding these things together and within half a day it looked like this.

Get out of the way, frame. What is that weapon behind you?

Mmmm…oily…
The biggest geometric change to the chassis I planned was fitting the 17-inch wheels. Stock wheel diameters are 19-inch front and 18-inch rear, so we had to understand what that would do to the trail and ride height. One evening Mario came over and we chocked the bike up so its tyres were just touching the ground and proceeded to measure it up and then transfer the dimensions to CAD.

The stock 18-inch rear wheel and tyre combination is very similar in diameter to a 17-inch wheel fitted with a 180/55 section tyre but it was obvious that a 17-inch front wheel fitted with a 120/70 tyre would be a lot smaller in diameter than the 19-inch front. This made the trail numbers drop from a barge-like 123mm to 100mm, which is more in keeping with numbers we see today. This meant that we could keep the stock offset for the triple clamps. The benefit here is that all the bits and pieces attached to the front end-needed less reworking.
Rake would be marginally reduced by an irrelevant 1.4 degrees and ride height would be reduced by 32mm at the crank centreline, but that will be countered by stiffer springs with much less sag than the sorrowfully saggy ones in it. Overall, this means that I can change out the wheels for modern ones and fit state-of-the-art tyres without having to redesign a lot of chassis parts to accommodate them. All this would be realised as a lighter steering effort from the reduced trail and gyro from the flywheel-heavy like-stock units, along with much improved handling and grip.
Better handling and more grip means more speed. More speed means higher forces are transferred to the suspension and chassis. These forces need to be controlled. To help manage them I opted for a set of 43mm Yamaha first generation FZ1 forks and twin Öhlins dampers on the rear.
I chose FZ1 forks because they were long, which maintains my ride height and ground clearance. Being some 6mm greater in diameter than the stock forks they’re much stiffer as well. They are a cartridge fork with spring preload, compression and rebound adjustment and thus light years ahead of the old damper rod forks. The beefier forks up front look cool, too. I was not tempted to go with upside down forks because in my mind they detract from the visual character of old bikes.

A classic piece for any room in the house.
For the rear I chose the ubiquitous Öhlins twin units. They’re only adjustable for spring preload but the price was right, as I got them from a forum group buy direct from Öhlins with the added bonus of choosing a spring rate for my riding weight. I know that some people convert these bikes to a single shock rear end, but I kept it as a twin for the same reason as staying with RWU forks.

Yes, that’s not quite like it was, is it?
The wheels are off a CBR600F4i. They look light and are light with their thin three-spoke design. The rear wheel was around six-kilos lighter than the original! To complete the wheel and suspension package, I fitted 330mm dinner-plate-sized brake rotors from a 929/954 ’Blade because big brakes look cool and they bolt straight onto the wheels. The CBR600F4i four-piston Nissin calipers were fitted to the forks via an adaptor bracket courtesy of my brother Mario and his CNC magic. Applying the pressure via custom-made braided Teflon brake lines is a radial master cylinder from a 2008 ’Blade. The rear-brake rotor is from a CBR600F4i and the rear caliper is a standard issue Brembo bolted to a custom bracket. And yes, the brakes work…fabulously.

Stop. Now. No. Now.

Imagine if they used these back then.
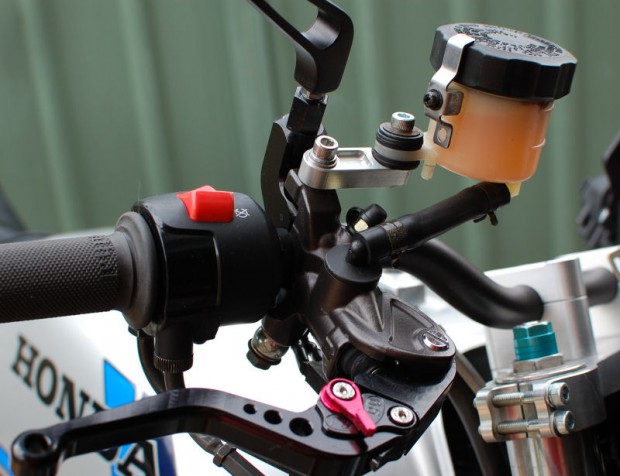
It’s the detail that gets you every time.
Fitting the Yamaha forks to the steering head and wheels necessitated a custom set of triple clamps with handlebar mounts. I couldn’t run clip-ons above the triple as per the stock Bol d’Or because whilst the FZ1 forks are long they’re not that long and I’m too old to be bent over with below-the-clamp clip-ons.

Gee, they look nothing like the originals.
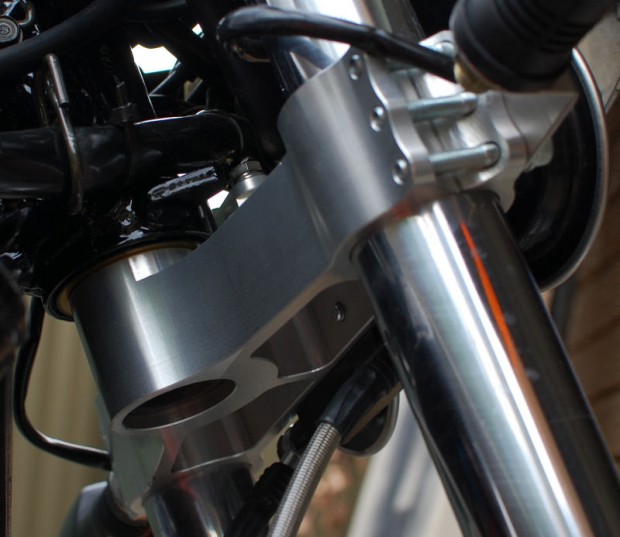
Strength and honour.
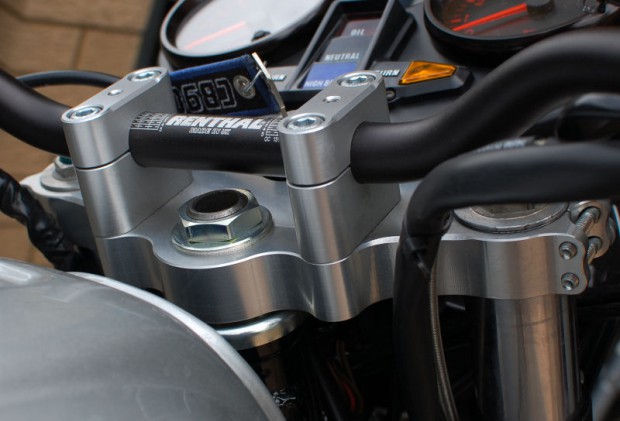
The workmanship is just incredible.
The rear suspension units were bolted on to the stock upper mounts and custom-made adjustable lowers. These mounts allow me to adjust ride height without having to change spring preload.

Decisions, decisions.
Continuing on in the theme of managing forces fed into the chassis by the tyres and suspension, some consideration had to be given to the best ways to strengthen the frame to cope with the additional strain. For that I turned to master motorcycle physician, Tony Foale, and consulted his book on chassis design, and in particular this article on the very subject which is available online
http://www.tonyfoale.com/Articles/Frame.mod/KawaMods.htm.
I also had to keep in mind that this bike is meant for the road and not the track, so any bracing would have to clear all the bits and pieces needed for a road going machine like battery, reg/rectifiers, lights, relays, etc.
Tony says the main area of need with these old frames is to improve torsional rigidity to counter cornering forces and the twisting force on the frame and swingarm imposed by the motor pulling on the chain. The following series of pictures shows what Mario did with tube notcher and welder, but not before I took to the frame with an angle grinder to remove unwanted and/or ugly bits.

Begone, ugly shit.

Take that, Honda.

You were such a dirty girl…

…until I cleaned you up.
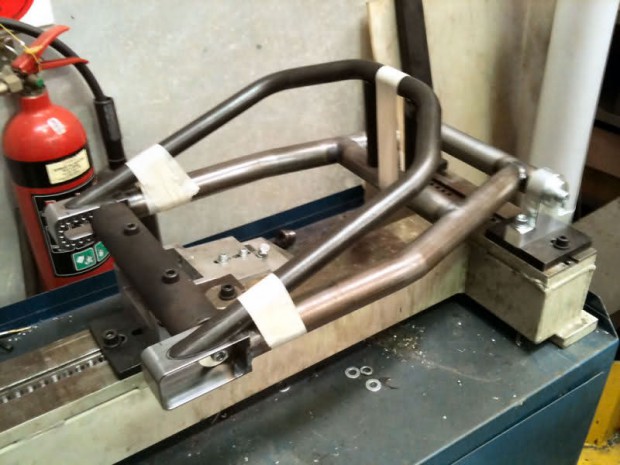
The tape is there for modesty purposes.

A man could really swing on that arm.
Honda had made the front right lower frame-rail removable to enable engine removal. What is also does is act as a hinge. The simplest option for removing the hinge is to weld it solid, however, a subsequent engine removal would require dropping the sump and removing the valve cover. I came up with an idea that not only strengthened the weakness but kept the utility for engine removal.

Simple, elegant and smart.

These used to break when you hit a tree at 180km/h.
After the frame rework was finished and the custom swing-arm made, I sent it out for blasting and paint. At the same time I collected a bagful of nuts, bolts, brackets and other hardware for re-use off to the platers for chrome or zinc, while a mate looked after the painting.

Waiting..waiting…waiting…

We’ll just take care of any and all swingarm issues for ever, shall we?
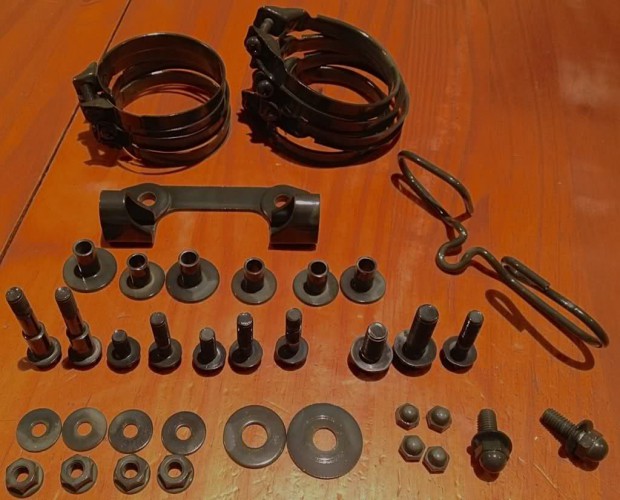
No, these were not left overs.
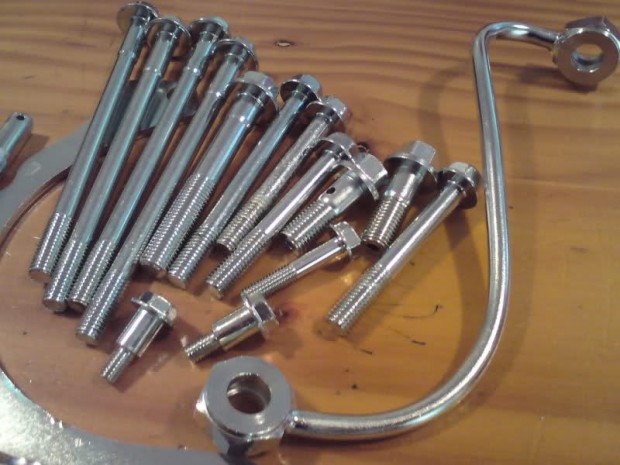
Wanna screw? And a tubey thing?

Prep. It’s the new black.
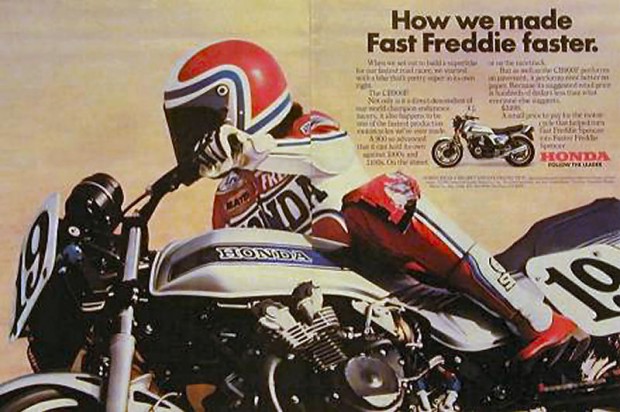
I wasn’t sure whether to go with a standard paint job or a custom one. I wasn’t convinced a custom job would work, so to satisfy both needs, I settled for the standard livery only seen in the USA and therefore not readily recognised at home. Here’s an example ridden by some bloke called Freddie Spencer.

Freddy wasn’t bad on this thing.
A Honda VF1000F front guard looked just like a stock 900F one, just smaller, which nicely hugs the front tyre. Mounting it would need a custom solution. Oi Mario, come here! A guard-mount-come-fork brace was the result.
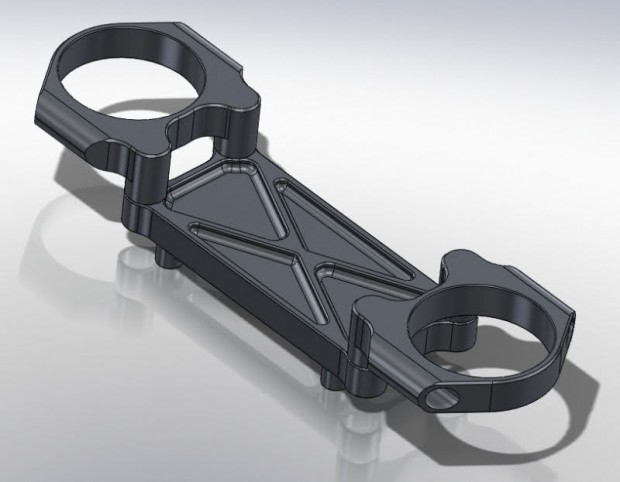
It’s like a cartoon…

Something out of Dragonball Z.
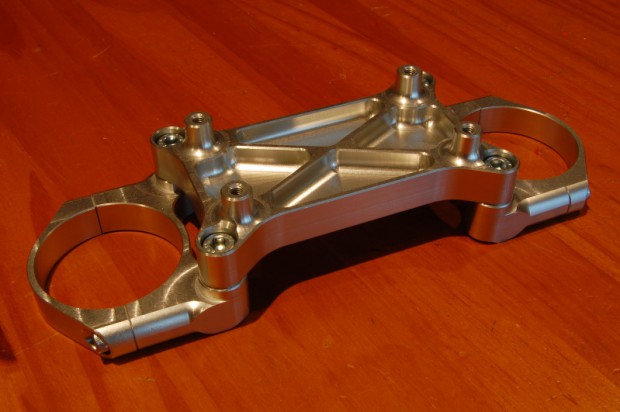
Until it’s real.

And mounted.
I now turned to motive power and to determine what was needed to be done to the engine. First things first – more cubes. The DOHC CB 750, 900 and 1100 shared many parts, but in order to turn a 900 into an 1100 I needed to get hold of barrels, cylinder head, pistons and conrods. A 900 head could’ve been used but not without a lot a rework to the pistons and combustion chambers. Using original 1100 components would be much easier.
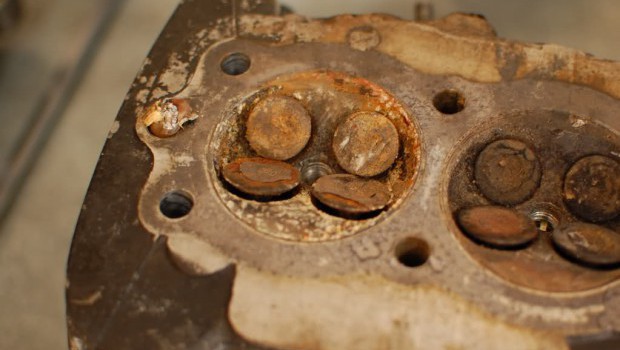
Now, 1100 stuff is pretty rare as they were made in limited numbers for the CB1100R and for only one year of regular production for the CB1100F. I found an 1100F head and barrels at a wrecker but whilst ugly from being out in the weather a close inspection found that they were salvageable.

Salvageable. Apparently.

Salvaging in progress.
The head and barrels were wet vapour blasted which brought them up to a nice satin alloy finish. The now sadly closed MMTs of Granville looked after the boring of the barrels for the Wiseco 1123cc forged piston kit.

Touch yourself. It’s alright. Many already have.
The standard ports have heavy bosses cast around the valve guides in both the exhausts and inlets and the lack of fine-casting prowess of the time left behind flow-robbing steps from the mismatch at the junction of port and valve seat. Both conditions are known thieves of power. The valves were shot and replaced with Kibblewhite Black Diamond 1mm-oversize stainless ones.
The headwork was entrusted to RAMS Head Services at Windsor www.ramsheadservice.com.au for some porting and precision CNC valve-seat cutting. The cams and valve springs were in good condition and within specification, so I refitted them and reset the shims.
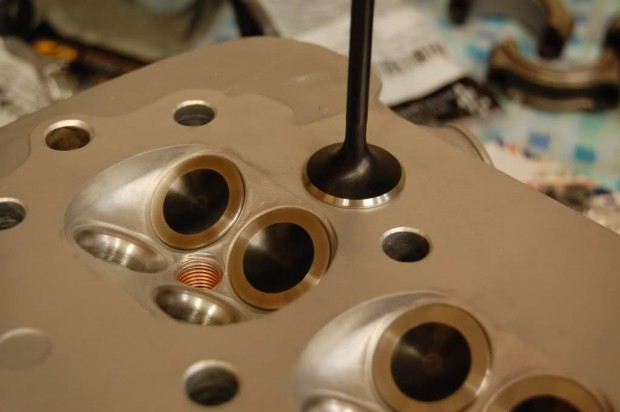
Almost a shame to dirty it all.
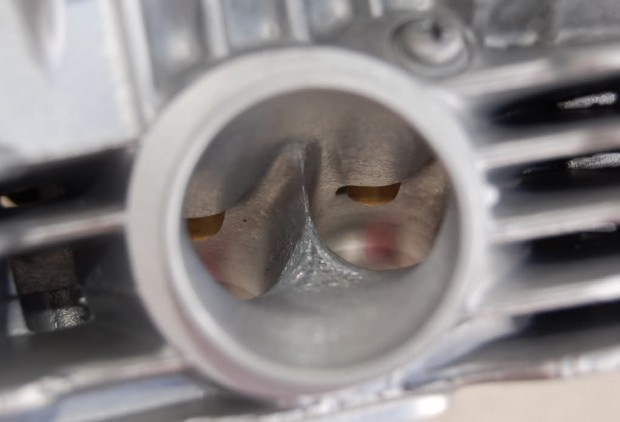
Sucking and blowing.
1100F conrods are more reliable than 900F ones due to their bigger gudgeon-pin bores (17mm vs 15mm), but are hard to find. No bother, Mario would just knock some up for me from billets of high strength steel with a bronze bushed little-end. The only outsourced work done on the rods was the pin-boring and shotpeening.
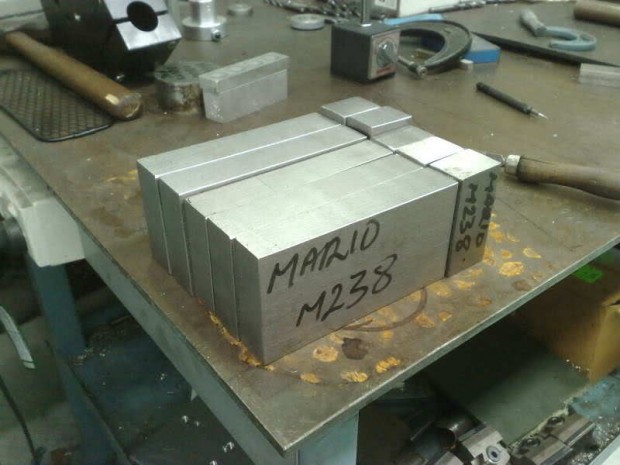
Mario is a man of steel.

And steel is Mario’s bitch.

Look at it being a bitch.
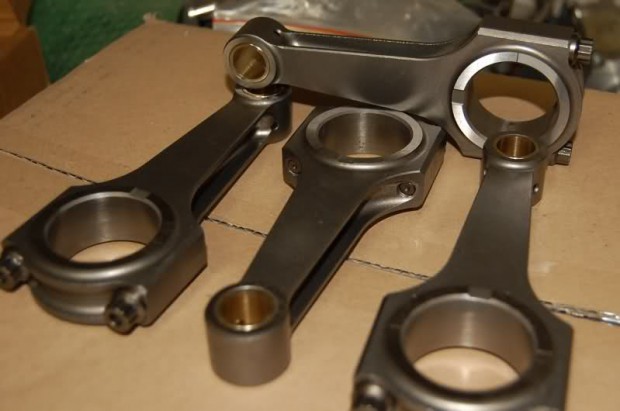
Ready to serve, master.
Honda introduced an oil cooler with the 900/1100 models and included an additional stage in the oil pump to circulate oil through the cooler and then back to the sump. However, they left the pump inlet the same even though it’s sucking twice as hard. A popular mod for improving reliability is to open up the size of the oil strainer delivery pipe. The rest of the bottom-end of the engine from the crank backwards remains standard and was treated to the usual refurbishing with new seals, bearings, damper rubbers in the clutch and primary drive. New chains were fitted throughout. A primary drive chain, an exhaust cam to inlet cam chain and the problematic chain from crank to exhaust cam, each with its own tensioner! Three chains and tensioners? What were you thinking Honda?
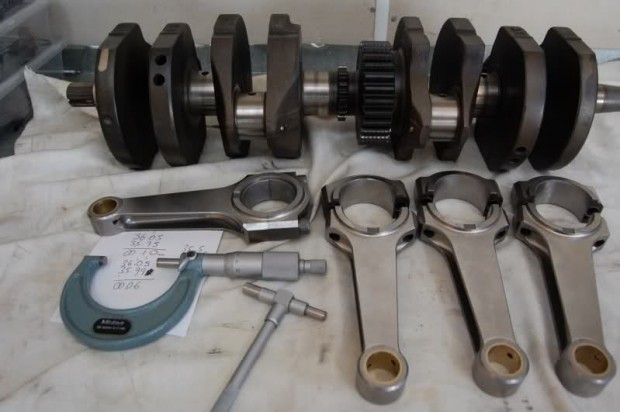
The weapons are ready to be deployed.

Yes, they did build them like this once.

Trick pliers. Very trick.
While on the subject of chains, another known weak point in the 900/1100 series engines was their appetite for cam chains. Honda beefed up the cam chain tensioner on the 1100 but that didn’t entirely cure the problem. It wasn’t until a Kiwi race-engine builder happened upon the source of the problem and set about developing a fix that it was sorted. Luckily for me he shared his findings on a forum. He says he’s had 100% reliability since making these mods, so hopefully I will too. It appears that the straightness of the front cam-chain guide-run allows the chain to vibrate and flap at certain rpm ranges due to harmonic resonances. This weakens the chain and causes it to prematurely fail. His mod was to manufacture a guide with a curved run which contains the chain along its run so that it can’t flap around. Genius observation! Needless to say I installed one of his guides.

A bit of Kiwi ingenuity.
The external cases and covers were soda blasted and then tediously masked up in preparation for some VHT satin black case paint. The valve cover was finished in VHT Wrinkle paint

The blue stuff did not stay inside the engine.

Yes, it is sexy.

Painstaking? A little.
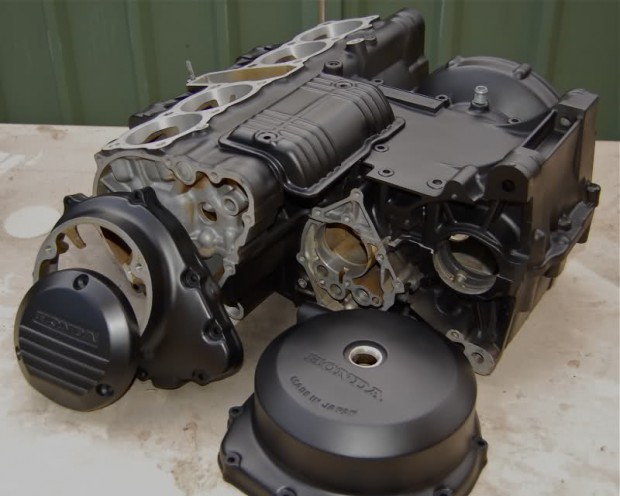
But what a result.

No, Honda could not have done a better job.
Engine assembly went together without a hitch. Valve timing set and the motor buttoned up and stuffed back into the frame. Ahh, light at the end of the tunnel. I could see it.

It runs on steam. Yes. That’s right.

Better than new? Hell, yes.

Hurry up, hurry up…
The stock Keihin CV carbs are a bit of a bag of arse. They work, but do nothing for performance or throttle response. The time-honoured fix is to whack on a set of rattly flatslide smoothbores. eBay came to the rescue again with a set of Mikuni RS 36mm flatslide goodies. However, these were set up for GSX-R1100 spacing so I stripped them down and re-spaced them and gave them a clean and overhaul along the way. Pretty, yes?

They suck.

They suck more.

A quiet night in.

Ready to suck like a million-dollar whore.
The resto was really starting to come together now, but there were still lots of small bits and pieces to be taken care of, such as bracketry for headlights and instruments, catch tank, fuse box relocation and attendant wiring harness mods, etc. Mario was busy.

Mario – another name for God.

Honda, do you see this?
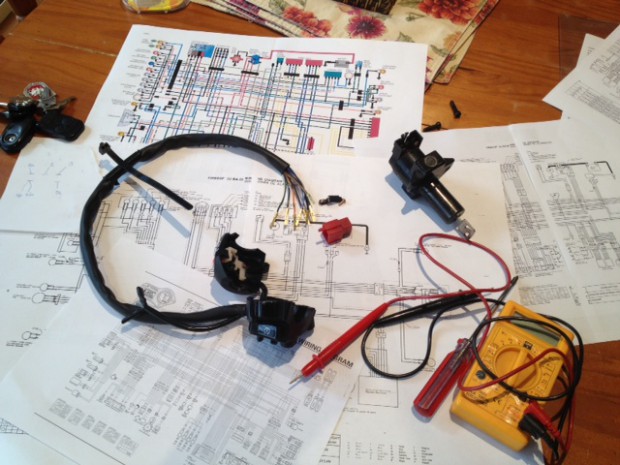
Ancient sorcery.
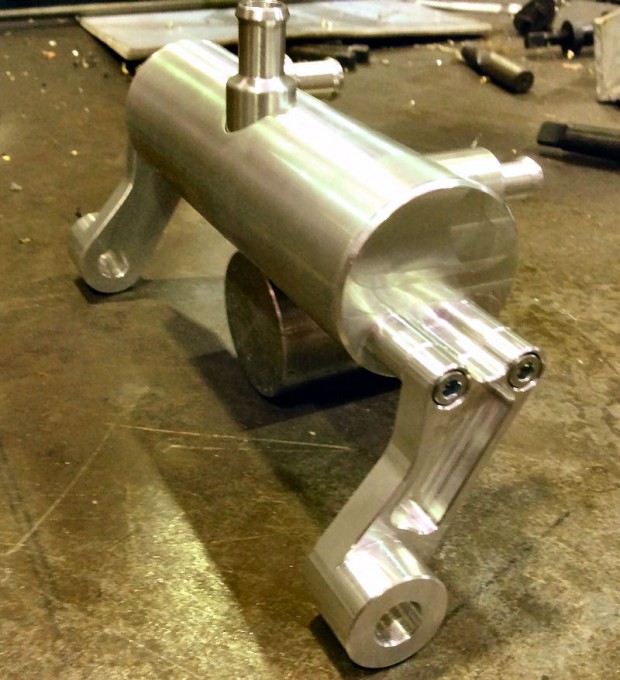
Even this is stunning.
The standard speedo and tacho gauges are mechanical units driven by cables. Since fitting new wheels and forks, the speedo-drive gearbox had long been consigned to the garbage bin so I had to think of an alternative. I noted that a number of newer bikes have electrical speedo sensors driven from the front sprocket so I thought I’d follow suite and picked up a mid 90’s Fireblade sensor. Mario designed and made me a neat mount and cover for it.

The cartoon version.
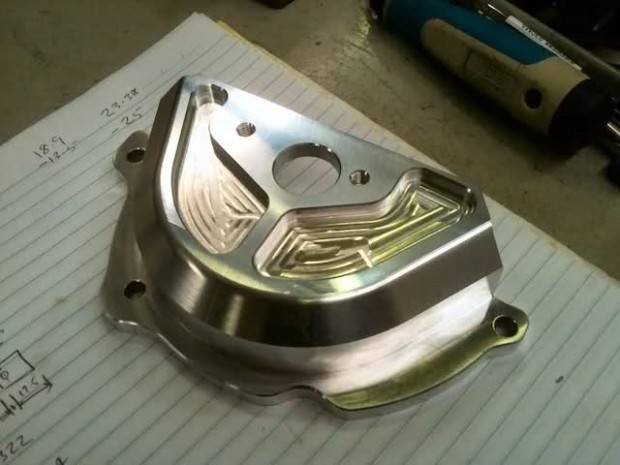
The finished product.
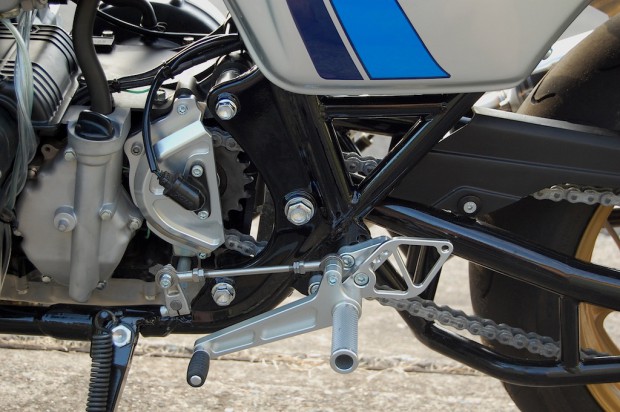
Yes, it is alright if you masturbate.
All I had to do then was wire it into the harness and install a Speedhut gauge. The beauty of the Speedhut gauges is that you can customise all aspects of their appearance. Needle styles, dial face colours, fonts and logos are all customisable. I chose a look that was close to the original red and black style.

Ready to fit.

Ready to mount.
I was going to buy an off-the-shelf exhaust but Mario was in a fabricating mood and said let’s make our own, it’s not hard…
And so with a bit of wire bending to form templates and then measuring them and transferring the dimensions to CAD, a drawing of each 1.5-inch OD stainless header was made. The drawings were sent to a mandrel-bending place and four header pipes came back. In the meantime, he knocked up some collectors and a tailpipe. The pipes were fitted with spring-loaded slip joints, a Yoshi RS3 muffler was shortened, bolted in place and job done. Sounds good too. As he said, it’s easy…for some.
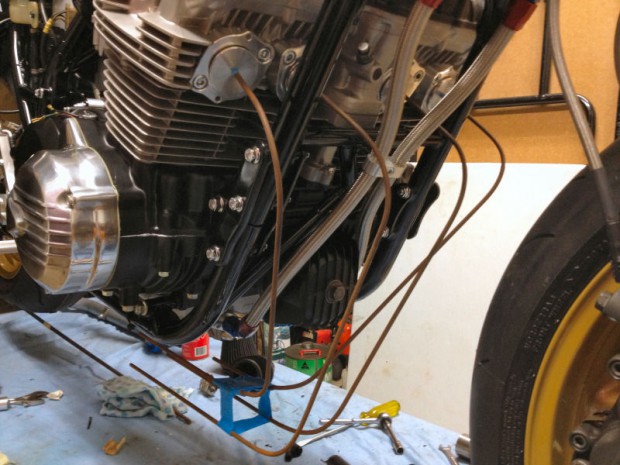
Tiny little pipes.
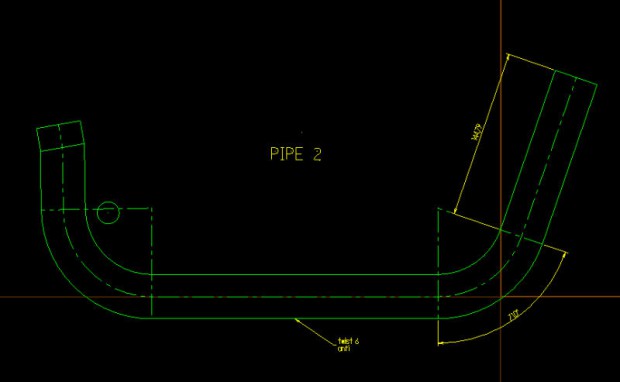
It’s like mathematics, but harder.
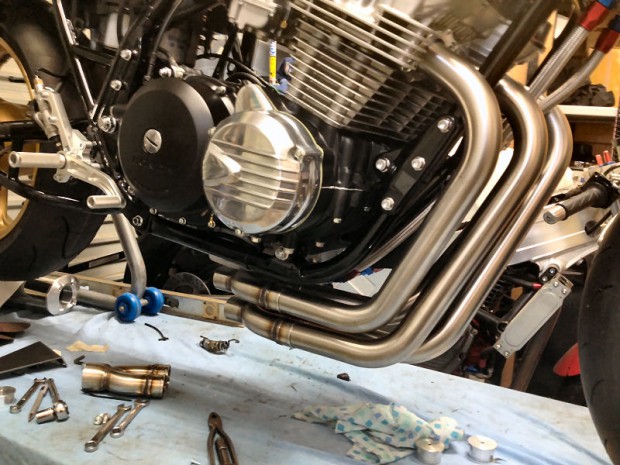
Oh, yes. Oh Jesus, yes!

Some quiet time, perhaps?

Even the stuff you can’t see is beautiful.

Close…so close.
The bodywork had all been painted and was waiting on the shelf. It took very little time to throw it all on. A new battery was fitted and there were no excuses left.
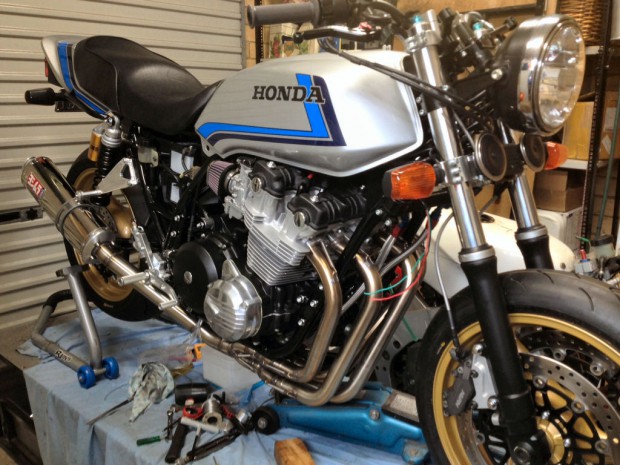
Dress me up, Daddy.

My bottom makes you a little excited, huh?
It was time to hit the button. Fuel tap on and damn, the carbs are overflowing. Not an unusual occurrence on these carbs, it seems. A bit of percussive persuasion and all is good again.
I press the electric leg to spin the engine over until the oil light goes out. Kill switch off and press the button again. After two short stabs she roars into life and settles into a rich idle. What a moment!
The carbs were synched on the bench and the idle mixture was rich. The whole thing needed a proper going over, but it was good enough to ride. I wanted to put about 800 kms under her wheels before dropping the Penrite running-in oil. As each kilometre registered on the odometer more and more throttle was given but something wasn’t quite right. Compression was only 10.5:1 and despite the premium 98 in the tank, the engine would ping its head off.
It dawned on me that the primitive spring and weight ignition advance mechanism was still the 900 version, not the 1100 which had a slower advance rate. I thought about tracking down an 1100 advancer but that is still a primitive system so I purchased an Ignitech programmable electronic ignition that had oodles of flexibility for tuning a custom-ignition advance curve. The unit needed to have the trigger rotor fixed in position so I stripped the advancer of its springs and bob weights and welded it solid. It was then a simple case of plug and play until a custom map was set up.

Hello. I am the thingamajig from hell.

Tidier than original.

To tune the ignition properly it had to be done on a dyno with a load cell. This job was given to C&M Motorcycles of Ingleburn. Craig, the ‘C’ from ‘C&M’, did what he does best and handed me back a smooth-running non-pinging motorcycle with 118 rear-wheel hoses. Not too shabby straight out of the shed.

So then, was it Mission Accomplished? Well, the bike now goes, stops and turns and I think it looks good so I’m quietly nodding to myself.

Ready. So very ready.
The (far from the) End…

